How to Tile a Bathroom
How to Tile a Bathroom - Bathroom DIY
Tiling a bathroom can be quite a tricky process. Professionals can charge a significant amount of money for good tiling work, and if you’re pushed for time and need a high-quality finish, this can be money well spent. However, if you’re looking to save money then it’s well worth considering taking on the tiling as a DIY project.
Tiling a bathroom can be quite a tricky process. Professionals can charge a significant amount of money for good tiling work, and if you’re pushed for time and need a high-quality finish, this can be money well spent. However, if you’re looking to save money then it’s well worth considering taking on the tiling as a DIY project.
In this guide, we will be teaching you how to tile your bathroom step-by-step. We’ve also included some FAQ’s that we often hear people asking about tiling. Whether you’re tiling and entire wall, floor, shower cubicle, or are simply creating a feature wall; we hope that this information helps you gain some handy DIY skills.
WHICH BATHROOM TILES ARE RIGHT FOR ME?
There are many tiles available to buy on the market today. When you’re preparing to tile a bathroom such a wide selection can become quite confusing. We suggest taking your time to explore different looks before committing to your tile choice. Think about your bathroom’s design as a whole and try to visualise tiles in your bathroom as you browse for them.
Most bathrooms tiles are either porcelain or ceramic. These types of tiles tend to offer a sleek look but without costing an absolute fortune. Porcelain tiles tend to be more hardwearing than ceramic tiles. However, this means that sometimes they can more expensive than ceramic tiles. Porcelain is also more impervious to water than ceramic is but it is also harder to cut without experience than ceramic tiles. Both types of tiles have their own benefits and either would be suitable for a bathroom.
Natural stone tiles are a stunning option for bathroom suites. However, they tend to be pricier and harder to install in comparison to porcelain or ceramic tiles. Tiles made of stone or limestone are far more porous and absorbent than porcelain and ceramic tiles too. This means that natural stone tiles will need sealing a lot more regularly. If you’re new to tiling then we recommend steering clear of stone tiles. Stone tiles require a lot of up-keep that the aforementioned tiles do need to be sealed every year to maintain their condition.
WHAT TILES DO WE SUGGEST FOR YOUR BATHROOM?
RAK CERAMICS
RAK ceramics is the largest manufacturer of bathroom tiles in the world. With a company ethos of sustainability and leading designs, when you choose from a RAK collection, you are assured high quality and long-lasting products for your bathroom. We are proud to offer them to our customers at such great prices.
RAK Ceramics Dolomite Light Grey Matt Tiles
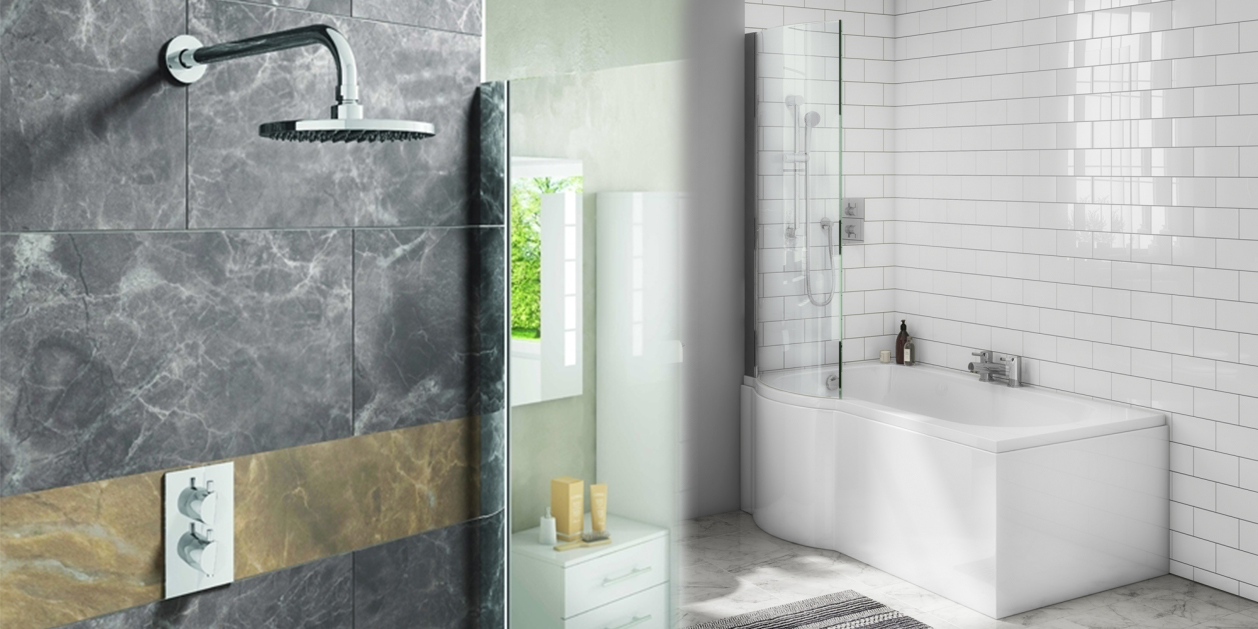
The Dolomite range from RAK Ceramics exudes luxury and offers a high-end appearance. They grey colour is perfect if you’re looking for a subtle, clean colour. Constructed from hardwearing ceramic, these tiles are perfect for bathroom use and are designed to stand the tests of time.
RAK Ceramics Surface 2.0 Mix Décor Tiles
These tiles showcase unique, intricate details that will draw attention. The look that these tiles offer is often referred to as a “patch work” effect that is perfect for eclectic bathroom suites. These tiles have been made from porcelain and have a matt finish.
RAK Ceramics Loft Brick Glossy Tiles (Brown)
As the name suggests, these tiles offer a high-gloss look that create a luxurious look wherever they are applied. They have an attractive size and the neutral tone of these tiles will enable them to be fitted in many types of bathroom designs. As with all RAK Ceramic products, these tiles are made to the highest standards and are known for their visual and functional excellence.
HOW MANY TILES DO I NEED?
After you’ve chosen your tile you will need to think of how many you will need for your bathroom. It’s really important that you measure the bathroom properly before you begin. It may seem obvious, but always double check your measurements before purchasing your tiles. We suggest getting more tile than what you need to allow for cut pieces. Wastage and breakage may also happen when you are tiling a bathroom. Having spare tiles on hand will be very useful as you won’t need to waste time and money on buying extra tiles.
Our website features a handy tool that makes buying tiles for your bathroom a little bit easier. When you click on a tile that catches your eye you will see two tabs just under the specifications of the tile. By entering the square meters of your room, this feature will work out how many boxes of tile you will need.
WHAT WILL I NEED TO TILE A BATHROOM WALL?
Materials
- Wall tiles
- Filler (only needed if you have holes in your wall).
- Tile adhesive
- Tile spacers
- Sealant
- Grout
- Tile cutter (manual ones can be found at a low price).
Tools
- Tape measure
- A cloth
- Pen – if required, to mark tiles for cutting
- Trowel
- Notched trowel
- Grout spreader
- Grout finisher
- Hammer
- Sponge
- Bucket of water
- Sealant smoother
CLEANING AND PREPARATION
Before you can start tiling a bathroom wall, you need to clean and prepare the wall. If you do not do this then there is a chance that the final result of the project may look off. This could cause you to spend money having to rectify this at a later date which defeats one of the main benefits of taking this on by yourself. Wash you walls with TSP solution. This will completely wash away dirt and grease from them.
HOW TO TILE A BATHROOM WALL
Step 1
Take some of your tile adhesive with the trowel and press it onto the wall. You can then proceed to work the adhesive with a notched trowel, working away from the corner with horizontal strokes. The ridges that the trowel leaves in the adhesive evens out the adhesive. This makes it more likely that you’ll apply the tile evenly for a professional look.
Step 2
Start tiling in a corner next to the timber battens (this is where the corner tiles will eventually go) and hold it firmly in place. Continue by adding a tile above your first one and one next to the original tile, spacing them by eye. If you get adhesive on the tile as you’re trying to place them, wipe it off with a cloth as this can be hard to remove at a later time.
Step 3
Put tile spacers into the corners between the tiles and adjust the tile positions if they do not look right.
Step 4
Add another tile above the last one you applied, and another beside it. This is a step you will repeat until the entire wall is covered in your chosen tile.
Step 6
Apply another square metre of adhesive and tiles until you have fixed all of the whole tiles.
Step 7
At the edges of the wall, put one leg of the spacer between the tiles. These will protrude slightly.
Step 8
Have a break and allow the adhesive to dry.
Step 9
You can now begin to work on the other walls that need tiling. Start from the corner beside the tiles you’ve already fixed.
Step 10
Once the tiles are dry and fixed you may remove the battens with the claw of a hammer.
Step 11
Now you’ve fixed all of the whole tiles, you’re ready to move on to applying cut tiles at the edges of the wall and in the corners. You need to trim the corner tile before you lay it. You will need to align the tile you plan to use in the corner to mark where you will need to cut. Use a tile cutter to cut down the tile and proceed to apply it to the wall.
HOW TO GROUT BATHROOM WALL TILES
Grouting ensures that your tiled walls will be water tight. Grouting should be done once your tiles have been applied and the adhesive has had time to dry properly. Before grouting you should remove the tile spacers mentioned above. You don’t want to leave spacers in for too long as they can get stuck in between your tiles. You will need to remove them before the adhesive has fully set. However, the setting time alters so we recommend checking the instructions given by the manufacturer of the products you use.
Step 1
Remove all tile spacers. As a general rule of thumb, you should remove the spacers in a vertical fashion as opposed to prizing them away from the wall by wiggling them vertically.
Step 2
Starting in the bottom left corner, press a small amount of grout on to the face of the tiles with a trowel. Use a grout spreader to create upward diagonal strokes working the grout into the joints between tiles. Work in sections and make sure you cover all the joints working quickly as grout hardens.
Step 3
Immediately after you finish applying the grout, wipe over your tiles with a slightly damp sponge. Be cautious when doing this as you do not want to take grout out of the joints.
Step 4
Once the grout has hardened slightly, use a grout finisher to give the joints a neat appearance. Pull the finisher along the joints in one continuous movement.
Step 5
After you’ve done this, you can take another break and wait for everything to dry. Wipe your tiles down once more once it is dry.
And there you have it: our guide to tiling your bathroom walls. We hope that today’s article has showed you that with a bit of time, patience, and information, you can dabble in a bit of DIY. If you have any reservations about tiling by yourself then do consult a professional. Remember to keep up to date with our blog if you want to see more articles that are bathroom related. You can also follow us on social media for news on bathroom design and the most anticipated upcoming bathroom products.
